Provision a web server on Linux instance with bootstrapping script
Step 1: Log in to the AWS management console. Find for ec2 service in the search bar provided on the page. Click on the Launch Instances.

Step 2: After clicking on the launch instance you will be redirected to this page. Here search/select Amazon Linux 2 AMI.

Step 3: Choose an Instance Type over here.
-
Select General purpose type t2.micro Instance Type.
-
Click on Next: Configure Instance Details at the bottom right of the screen.

Step 4: Here you will Configure Instance Details.
-
In the Subnet field select on the drop-down list and select any one of the Subnets.
-
In the Auto-assign Public IP field select on the drop-down list and select Enable option.
-
Click Next: Add Storage at the bottom right of the screen.

Step 5: Continue to scroll down and under Advanced Details, paste the following script in the user data text area.
#!/bin/bash
yum -y update
yum -y install httpd
chkconfig httpd on
service httpd start
echo "<html><h1>Hello! How are You? This is your Web erver!</h1></html>" > /var/www/html/index.html

Step 6: Add Storage
-
In this step keep all the default settings as they are and click on the
Next: Add Tags button at the bottom right of the screen.

Step 7: Add Tags
-
Key: Name
-
Value: Linux Server
Click on the Next: Configure Security Group at the bottom right of the screen.

Step 8: Configure Security Group
-
Create a new security group and name it as WEBSERVER_SG
-
In the description enter the following text: Security Groups for webservers
-
Keep the default SSH rule and add a new rule. From the drop-down list select HTTP Rule.
-
Warning: Rules with a source of 0.0.0.0/0 allow all IP addresses to access your instance. We recommend setting security group rules to allow access from known IP addresses only.
-
While using this feature for production make sure the known IP address is entered.
-
Click on Review and Launch button on the bottom right corner

Step 9: Review Instance Launch
-
Here are all the details regarding your instance. Read them once and check if all the configurations are correct
-
Click on the Launch button at the bottom right corner. This will launch your instance.
-
After you click the launch button here you will be asked for a KEY-PAIR to download. This .pem file is necessary for the connection of our instance, download this file and keep it in a secure place.
-
Create a new .pem file and name it as LINUX_SERVER and click on Launch Instance.
-
Note: If existing Key Pair is available, acknowledge the same and launch Instance.

Step 10: Now your instance is getting launched. scroll down the page and you will find a view instance at the bottom right of the screen.
-
Click the button to see your launched instance.
-
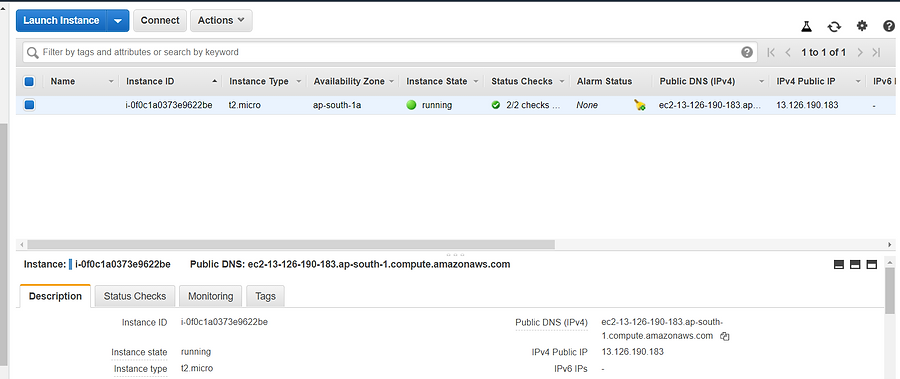
On the newly loaded page, you will see the instance which is deployed.

Step 11: Check the Web Server Is Running
-
Copy the IPv4 Public IP or the DNS name. Search the IP address to check if the webserver is running
-
If the message is visible, it message means the webserver is running.

Step 12: If you no longer need this instance make sure to terminate the instance
-
Click on the drop-down menu beside the Actions button.
-
Select the Instance State and click on Terminate.
-
This will terminate your instance.

Document Created by
Version
Parag Deshpande
27-Aug-2020
