
Tutorial Blog to configure CodeDeploy to deploy an application on Amazon EC2 instance
- Vaibhav Deshpande
- Apr 10, 2024
- 5 min read

Learning Objectives:
Learn to create configure CodeDeploy.
Learn to create deploy WordPress on an Amazon EC2 instance.
Prerequisite:
Download master.zip file from here.
Step 1: Create a role.
In AWS console, go to IAM, go to Roles, and choose Create role.

Under Select type of trusted entity, select AWS service. Under Choose a use case, select EC2. Under Select your use case, choose EC2. Choose Next: Permissions.

Search for and select the policy named AmazonEC2RoleforAWSCodeDeploy.

Choose Next: Review. Enter a name for the role (for example, EC2InstanceRoleForCodeDeploy).

Choose Create role.

Choose Create role.

Under Select trusted entity, choose AWS service. Under Use case, choose CodeDeploy. Choose CodeDeploy from the options listed. Choose Next.

The AWSCodeDeployRole managed policy is already attached to the role.
Choose Next.

Enter a name for the role (for example, CodeDeployServiceRole), and then choose Create role.

Choose Create role.

Step 2: Create a EC2 instance.
Open the Amazon EC2 console at new tab.
Go to instances and choose Launch instances.
Under Name and tags, give name as my-wordpress.

In Application and OS Images. Here search/select Amazon Linux 2 AMI

Choose an Instance Type over here.
Select General purpose type t2.micro Instance Type.
select existing key pair.
Choose an existing key pair option from the drop down.

In Network settings section, click edit to change the following.
a) In the Subnet field select on the drop-down list and select any one of the Subnets.
b) In the Auto-assign Public IP field select on the drop-down list and select Enable option.

Configure Security Group
a) Create a new security group and name it as WEBSERVER_SG
b) In the description enter the following text: Security Groups for webservers
c) Keep the default SSH rule and add a new rule. From the drop-down list select HTTP Rule.
d) Note - Warning: Rules with source of 0.0.0.0/0 allow all IP addresses to access your instance. We recommend setting security group rules to allow access from known IP addresses only. Ignore this for this Tutorial.
e) While using this feature for production make sure the known IP address is entered.

In Advanced details, under IAM instance profile, attach EC2 instance role that you created previously (AmazonEC2RoleforCodeDeploy).

Keep rest as default and click on Launch instance.
Step 3: Now, go to CloudShell, which is at the bottom left corner of your console (or to the right of your search bar as well).

Once you click on the CloudShell icon, a terminal interface will appear as below.

Upload the master.zip file in CloudShell.
To upload the file, click on action button on top right corner of CloudShell and click on Upload file.

Select the file and click on open.

You can see your file is uploaded.

Call the unzip, mkdir, cp, and rm commands to:
Unpack the master .zip file into the /tmp/WordPress_Temp directory (folder).
Copy its unzipped contents to the /tmp/WordPress destination folder.
Delete the temporary /tmp/WordPress_Temp folder and master file.
Run the commands one at a time:
unzip master -d /tmp/WordPress_Temp

mkdir -p /tmp/WordPress
cp -paf /tmp/WordPress_Temp/WordPress-master/* /tmp/WordPress
rm -rf /tmp/WordPress_Temp
rm -f master.zip

Create a scripts directory in your copy of the WordPress source code:
mkdir -p /tmp/WordPress/scripts
ls /tmp/WordPress

Create an install_dependencies.sh file in /tmp/WordPress/scripts.
nano /tmp/WordPress/scripts/install_dependencies.sh

Add the following lines to the file. This install_dependencies.sh script installs Apache, MySQL, and PHP.
#!/bin/bash
sudo amazon-linux-extras install php7.4
sudo yum install -y httpd mariadb-server php
Note: Save the code by pressing CTRL+O and hit enter.
To exit from the file press CTRL+X.

Create a start_server.sh file in /tmp/WordPress/scripts.
nano /tmp/WordPress/scripts/start_server.sh

Add the following lines to the file. This start_server.sh script starts Apache and MySQL.
#!/bin/bash
sudo systemctl start mariadb.service
sudo systemctl start httpd.service
sudo systemctl start php-fpm.service

Create a stop_server.sh file in /tmp/WordPress/scripts.
nano /tmp/WordPress/scripts/stop_server.sh

Add the following lines to the file. This stop_server.sh script stops Apache and MySQL.
#!/bin/bash
isExistApp=pgrep httpd
if [[ -n $isExistApp ]]; then
systemctl stop httpd.service
fi
isExistApp=pgrep mysqld
if [[ -n $isExistApp ]]; then
systemctl stop mariadb.service
fi
isExistApp=pgrep php-fpm
if [[ -n $isExistApp ]]; then
systemctl stop php-fpm.service
fi

Create a create_test_db.sh file in /tmp/WordPress/scripts.
nano /tmp/WordPress/scripts/create_test_db.sh

Add the following lines to the file. This create_test_db.sh script uses MySQL to create a test database for WordPress to use.
#!/bin/bash
mysql -uroot <<CREATE_TEST_DB
CREATE DATABASE IF NOT EXISTS test;
CREATE_TEST_DB

Finally, create a change_permissions.sh script in /tmp/WordPress/scripts.
nano /tmp/WordPress/scripts/change_permissions.sh

This is used to change the folder permissions in Apache.
#!/bin/bash
sudo chmod -R 777 /var/www/html/WordPress

Give all the script’s executable permissions. On the command line, type:
chmod +x /tmp/WordPress/scripts/*

Create a file named appspec.yml.
nano /tmp/WordPress/appspec.yml

Add the following lines to the file:
version: 0.0
os: linux
files:
- source: /
destination: /var/www/html/WordPress
hooks:
BeforeInstall:
- location: scripts/install_dependencies.sh
timeout: 300
runas: root
AfterInstall:
- location: scripts/change_permissions.sh
timeout: 300
runas: root
ApplicationStart:
- location: scripts/start_server.sh
- location: scripts/create_test_db.sh
timeout: 300
runas: root
ApplicationStop:
- location: scripts/stop_server.sh
timeout: 300
runas: root

Step 4:
Call the mb command to create an Amazon S3 bucket named codedeploydemobucket-my-wordpress-bucket:
aws s3 mb s3://codedeploydemobucket-my-wordpress-bucket --region ap-south-1

On the development machine, switch to the folder where the files are stored:
cd /tmp/WordPress
Call the create-application command to register a new application named WordPress_App:
aws deploy create-application --application-name WordPress_App

Call the CodeDeploy push command to bundle the files together, upload the revisions to Amazon S3, and register information with CodeDeploy about the uploaded revision, all in one action.
aws deploy push \
--application-name WordPress_App \
--s3-location s3://codedeploydemobucket-my-wordpress-bucket/WordPressApp.zip \
--ignore-hidden-files

aws s3 ls s3://codedeploydemobucket-my-wordpress-bucket

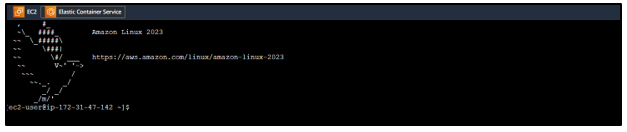
Step 5: Open EC2 instances and click on Connect.


sudo yum update -y

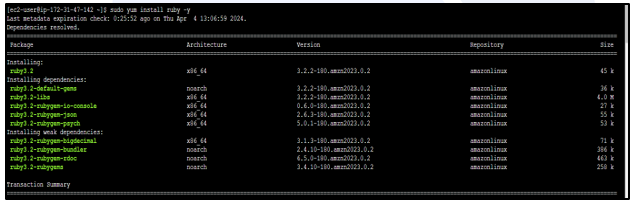
sudo yum install ruby -y

chmod +x ./install

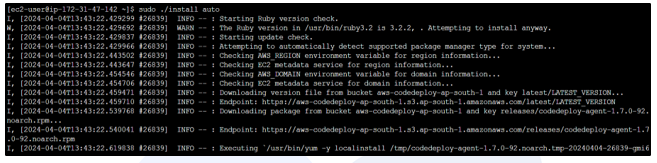
sudo ./install auto
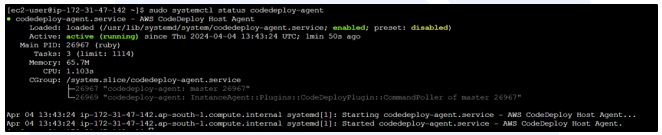
sudo systemctl status codedeploy-agent
Step 6:
Now go to IAM service and go to the roles and click on CodeDroloyServiceRole, copy the ARN

Now that you have the service role ARN, call the create-deployment-group command to create a deployment group named WordPress_DepGroup, associated with the application named WordPress_App, using the Amazon EC2 tag named CodeDeployDemo, and deployment configuration named CodeDeployDefault.OneAtATime
Note: Go back to CloudShell
Note: Replace by arn:aws:iam::account-no:role/CodeDeployServiceRole
your CodeDeployServiceRole ARN.
aws deploy create-deployment-group \
--application-name WordPress_App \
--deployment-group-name WordPress_DepGroup \
--deployment-config-name CodeDeployDefault.OneAtATime \
--ec2-tag-filters Key=Name,Value=my-wordpress,Type=KEY_AND_VALUE \
--service-role-arn arn:aws:iam::12345678958:role/CodeDeployServiceRole

Now call the create-deployment command to create a deployment associated with the application named WordPress_App, the deployment configuration named CodeDeployDefault.OneAtATime, and the deployment group named WordPress_DepGroup, using the application revision named WordPressApp.zip in the bucket named codedeploydemobucket-my-wordpress-bucket:
aws deploy create-deployment \
--application-name WordPress_App \
--deployment-config-name CodeDeployDefault.OneAtATime \
--deployment-group-name WordPress_DepGroup \
--s3-location bucket=codedeploydemobucket-my-wordpress-bucket,bundleType=zip,key=WordPressApp.zip

Get the deployment's ID by calling the list-deployments command against the application named WordPress_App and the deployment group named WordPress_DepGroup:
aws deploy list-deployments --application-name WordPress_App --deployment-group-name WordPress_DepGroup --query 'deployments' --output text

Go to CodeDeploy there you can see your App is Deployed.

Step 7: Login to WordPress
Go to EC2 and copy the Public IPv4 DNS.

Now paste URL/DNS in new browser along with /WordPress in the end.

This window will appear. Click on Let’s go!

Database: Name: test
Username: root
Password: keep blank
Rest is default and click on Submit.

Click on Run the installation.
Fill the following details accordingly. And click on install WordPress.

You will get the following window. Now click on Log In.

Now insert the details and login.

We have successfully Installed and login to WordPress. Now in the top left corner click on WordPress logo.

It will redirect you to this page.

Step 8: Update the application.
To update the application, Run the following command in CloudShell to open WordPress file.
nano /tmp/WordPress/wp-admin/about.php
Once the file is open find the word WordPress and add the following context before word WordPress.
Hi this is My update to the WordPress.


Note: Save the code by pressing CTRL+O and hit enter.
To exit from the file press CTRL+X.
Step 9: To update and redeploy the application, we need to zip and push revised code to S3 bucket.
Run the following command in CloudShell.
aws deploy push \
--application-name WordPress_App \
--s3-location s3://codedeploydemobucket-my-wordpress-bucket/WordPressApp.zip \
--ignore-hidden-files


Run the following command in to redeploy the application.
aws deploy create-deployment --application-name WordPress_App --deployment-config-name CodeDeployDefault.OneAtATime --deployment-group-name WordPress_DepGroup --s3-location bucket=codedeploydemobucket-my-wordpress-bucket,bundleType=zip,key=WordPressApp.zip

Now go back to your browser and refresh the page to check the update.
Here you can see your page is updated.

If you no longer need then you can delete the EC2 Instance, S3 bucket and application from CodeDeploy.
Was this document helpful? How can we make this document better. Please provide your insights. You can download PDF version for reference.
For your aws certification needs or for aws learning contact us.

It is easy to learn to configure codeDeploy to deploy an application with the help of this blog.
Learning how to configure CodeDeploy to deploy an application with the help of this blog
Learnt to configure CodeDeploy to deploy an application on Amazon EC2 instance