
Create thumbnail images using AWS Lambda and Amazon S3
- Soham Pingat
- Oct 6, 2021
- 2 min read

Updated: Feb 19, 2024
This blog is updated by Apurv Deshpande & Dhanush Prabakaran
Tutorial Objectives:
1. Learn to create Lambda functions using AWS Management Console.
2. Learn to implement event-driven architecture using S3 as event source to invoke Lambda function.
Step 1: In Lambda service console, go to Function in the left navigation panel.
Click on Create Function.

Click on Create Function.
Select Author from Scratch to create a Function.

Function Name: create-thumbnail
Runtime: Python 3.9
Architecture: x86_64

Expand Change default execution role.
Execution Role: Create a new role with basic Lambda permissions.
Click Create Function.

Click on Configuration. In the left side panel, Click on Permissions.

Click on the role name which appears.
This will redirect you to the #IAM console.
Click on Attach policies.

Select Policy Name: #AmazonS3FullAccess and Click Add Permissions.


You will see above two policies in the IAM console.
Step 2:
Download the thumbnail.zip file from here:
This will download the thumbnail.zip file on your local machine.
Go back to Lambda console.
Click on Code and at the right corner upload from .zip file

Choose Save.
Create two buckets in the same region as of Lambda Function i.e. Mumbai here.
Create the first #bucket.


Click on Create bucket.
Bucket name: myimage3114141
The #AWSregion should be the same.

Public Access should be blocked.

Click Create bucket.
Similarly, follow the same above step for creating a second bucket.
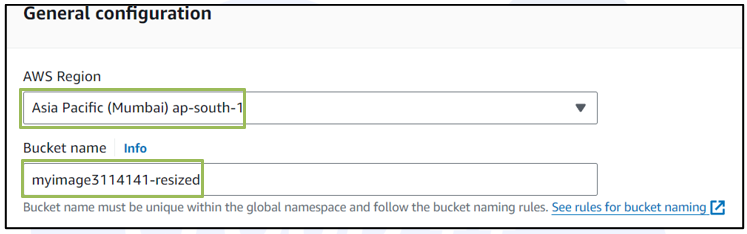
Bucket Name: Paste the name of the previous bucket you have created and append
-resized at the end of the name i.e. (myimage3114141-resized)
Click Create Bucket.
Now you have the buckets named as:
● myimage3114141
● myimage3114141-resized
Step 4: Go to the Lambda Function.
Open the #Functions page of the #Lambda console and choose your function (create-thumbnail).
Choose Add trigger.

Select S3.

Under Bucket, select your source bucket (myimage3114141)
Under Event types, select All objects create events.

Click on I Acknowledge and click Add.
Choose Add.
Step 5: Go to the S3 console.
Go to Source bucket your source bucket (myimage3114141 in our case)
and upload any image file with no space in the file name.

Click on Upload.

Note the size of the file is 250.8 KB.
To check your function has created a resized version of your image and stored it in your target Amazon S3 bucket, do the following:
Now Go to Resized bucket and check the resized image.

Note the size of the file is 83.5KB.
Thus, the file which we uploaded in the source bucket is resized in the destination bucket with the help of #lambdafunction.
NOTE: Empty #S3buckets and delete buckets. Delete the #Lambdafunction.
Was this document helpful? How can we make this document better? Please provide your insights. You can download PDF version for reference.
We provide best AWS trainings from Pune, India.
For #aws certification contact us now.


Helpful
Informative
Very good
Easy to understand.
Very Informative Blog!!