
Static Website Hosting in S3 Bucket
- Parag
- Oct 21, 2020
- 2 min read

Updated: Dec 9, 2021
Enable S3 bucket of static website hosting.
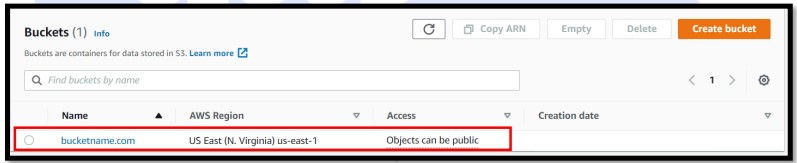
Step 1: In AWS console go to S3 services. Select Buckets and click on Create bucket.

Step 2: Give a bucket name as bucketname.com
Select a Region where you want to create the bucket.

Uncheck the Block all public access box and acknowledge.


Click on Create bucket in bottom.
Check your created bucket.
Step 3: Here make the bucket public by applying policy.
· Click on Bucket and open.
· Go to Permissions.

· Scroll down Click Edit bucket Policy

· Click on Policy generator.

New tab of Policy generator will open.
· Select Type of Policy as S3 Bucket Policy from drop down.
· In the textbox labelled as Principal enter asterisk (*).
· Ensure that the AWS Service, Amazon S3 is selected.
· Select the GetObject option from the Actions drop down.
· Copy and paste the ARN from the previous browser window and put /* after the complete ARN. It will appear like arn:aws:s3:::bucketname.com/*
· Click on Add Statement.

Scroll down and click on Generate Policy.

Copy the JSON code from the Policy JSON Document window.

Step 4: Paste this JSON code in the text area under Bucket policy editor. Scroll down and click on Save changes.

Navigate to the bucket level and you will notice the bucket access will be public.

Step 5: Upload four images in the bucket created above. We assume following images are uploaded for rest of the document.
· Image1.jpeg
· Image2.jpeg
· Image3.jpeg
· Image4.jpeg
Create a file named as index.html (note that the extension of the file is .html)
Add the following code in the html file and save.
<html xmlns="http://www.w3.org/1999/xhtml" >
<head>
 <title>My Website Home Page</title>
</head>
<body>
 <h1>Welcome to my website</h1>
 <p>Now hosted on Amazon S3!</p>
  <a href="Image1.jpeg">IMAGE 1</a>
  <a href="Image2.jpeg">IMAGE 2</a>
  <a href="Image3.jpeg">IMAGE 3</a>
  <a href="Image4.jpeg">IMAGE 4</a>
</body>
</html>
Create a file named as error.html (note that the extension of the file is .html)
Add the following code in the html file and save.
<html xmlns="http://www.w3.org/1999/xhtml" >
<head>
 <title>Error Page</title>
</head>
<body>
 <h1>Sorry!!</h1>
 <p>It seems there is an error!</p>
</body>
</html>
Step 6: Upload both error.html and index.html in the bucket.

Step 7: In bucket level go to Properties.

Scroll down to bottom of the page.
Click Edit besides Static website hosting.

Click on Enable radio button for Static website hosting
· Hosting Type: Host a static website
· For Index document type index.html
· Similarly, for Error document type error.html
Note: The file name is case-sensitive.
Click on Save changes button at the bottom right corner.

Check that this Static Website hosting property is applied.

Step 8: Click on the Bucket website endpoint.

Similar screen as below would appear. Click on any one of the image hyperlink and check if your static website is working.

Further if you don’t need the website make sure you delete the bucket created in this lab.
Was this document helpful? How can we make this document better? Please provide your insights. You can download PDF version for reference.
We provide the best AWS training from Pune, India.
For aws certification contact us now.


usefull
Easy to understand.
helpful article
Useful
Very Useful !