Tutorial Blog to upload a file to Amazon S3 Glacier using AWS CloudShell
- Vaibhav Deshpande
- Feb 26, 2024
- 3 min read
This blog is created by Tanaya Yalrute
Learning Objectives:
• Learn to create an Amazon S3 Glacier vault.
Step 1:
Create a vault in Amazon S3 Glacier (which can be done in two ways as mentioned below).
In AWS console, in search bar, type S3 Glacier and go to AWS S3 Glacier.

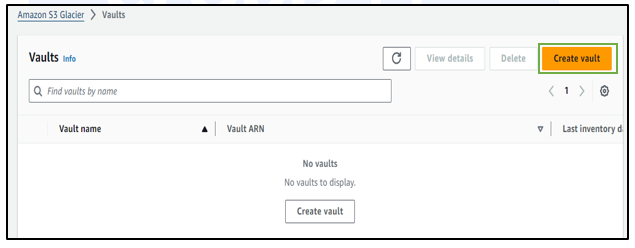
In S3 Glacier, click on Create vault.

In Create vault, under Vault name, enter the name of the vault and keep the rest as default.

Keep the event notifications as default and click on create vault.

As you can see, the vault is created successfully.

Now, go to CloudShell, which is at the bottom left corner of your console (or to the right of your search bar as well).

Once you click on the CloudShell icon, a terminal interface will appear as below.

In the terminal session of AWS CloudShell, run the yum update command to ensure the latest security updates and bug fixes are installed.
For Amazon Linux:
sudo yum -y update

Step 1 (Alternate):
To create a vault in Amazon S3 Glacier, use the create-vault command to create a vault named MyVault.
Replace the hyphen character by the account-id of your aws account.
aws glacier create-vault --account-id - --vault-name MyVault

Note: You can either create the vault from the S3 Glacier console (step 1) or from the CloudShell terminal (step 1-alternate) by running the create-vault command.
Step 2: Create a folder to upload in the vault.
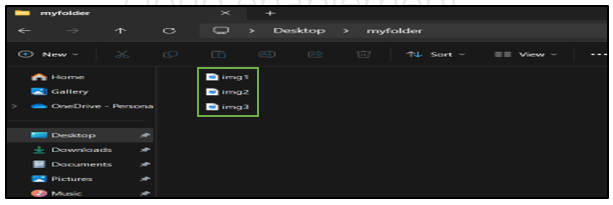
Go to desktop create new folder as my folder.
Download and upload any images inside the folder.

Then select images and click on compress to zip file.

Name the zip file as archive.zip.

Step 3:Upload the above created file to the CloudShell home directory.
Go to aws CloudShell, click on actions (which is at the top right space of your cloud shell terminal interface) select upload file.

Upload the archive file from desktop which we created in step 2.

As you can see, the file is uploaded successfully in the CloudShell home directory.

Now run the following command to upload the archive file from CloudShell directory into the vault.
aws glacier upload-archive --vault-name MyVault --account-id - --body archive.zip
Note: Replace MyVault and account id by your vault name and account id respectively.

Note: Kindly save this archive-Id on notepad for future use.
Step 4: Now to check the status of our vault run the describe-vault command -
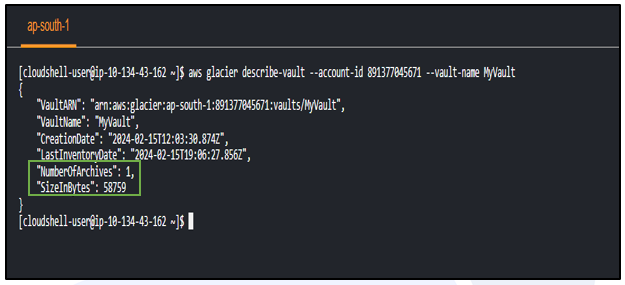
aws glacier describe-vault --account-id - --vault-name MyVault

Now as you can see, NumerOfArchives and SizeInBytes are still 0, which means the vault is yet to get updated.
Step 5:
Hence after 10 to 12 hours, when you run the describe-vault command again, you can see the NumberOfArchives (1) and SizeInBytes (58759) of the file which we have uploaded.

Step 6:
Now to delete the vault, we first need to empty the vault by deleting the archives.
For that use the delete-archive command-
aws glacier delete-archive --vault-name MyVault --account-id - --archive-id="*** archiveid ***"
Note: Replace MyVault and account id by your vault name and account id respectively.
In place of *** archiveid*** enter archive-id of your own vault.

Note: After running describe-vault command, you would not see any change in the status of the vault.

Step 7:
When you run the describe vault command again after 9-10 hours you can see that the NumberOfArchives and SizeInBytes is now 0.
This means, that the vault is now empty.

Step 8:
Therefore, we can now delete the vault by running the following
aws glacier delete-vault --vault-name MyVault --account-id –

Or you can directly delete it from your AWS S3 Glacier console.
Note: In case you forget to save the archiveId of your vault follow our tutorial blog to delete the vault by generating job-Id link .
Note: Kindly do not forget to delete the vault to avoid any AWS charges.
Was this document helpful? How can we make this document better. Please provide your insights. You can download PDF version for reference.
For your aws certification needs or for aws learning contact us.


Easy to follow
Easy to understand
Good blog
very useful sir
Easy to understand sir