
Tutorial blog to configure EC2 Image Builder
- Vaibhav Deshpande
- Feb 7, 2024
- 3 min read

This blog is created by Shruti Bhosekar.
Learning Objectives:
Learn to configure EC2 Image Builder.
Learn to create a pipeline to include image recipe, infrastructure configuration, distribution & test settings to produce the image
Step 1: Create an OS Image Build Pipeline.
Go to AWS console in search bar, search for EC2 Image Builder

Now click on Create image pipeline.

Under Specify pipeline details in general section , enter the name of your pipeline as MyImagePipeline and keep the rest default.

Now scroll down to Build schedule, under Schedule options keep the default option as Schedule builder and under Frequency drop-down list select Day and set UTC time according to your convenience. Keep rest as default.

Click on Next.
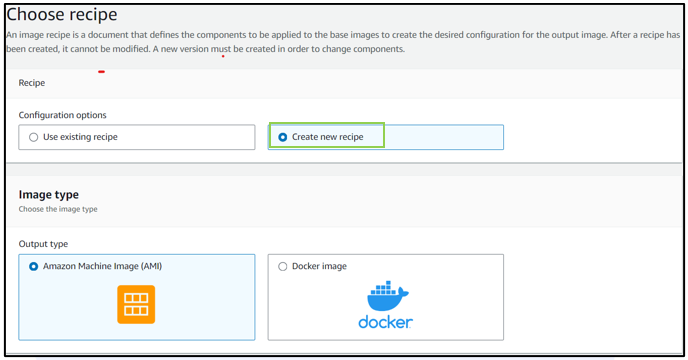
At step 2, Choose recipe, in configuration options select create new recipe. Now under Image type select Amazon Machine Image (AMI).
Now scroll down to General tab, under the Name give the name for your recipe as MyImageRecipe and also mention the version as 1.0.0 under Version.

Now scroll down to Base Image section, under Select Image, select Select managed images, and under Image Operating System, select Amazon Linux.
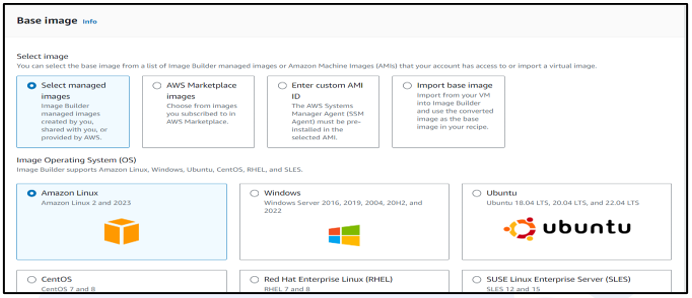
Under Image origin, select, Quick start (Amazon-managed).
Further under Image name drop-down, select Amazon Linux 2 x86.

Keep everything else default and scroll down to Component section, and at step 1, search python to select python-3-linux component.

Similarly search and select, go-linux and amazon-corretto-11 components.
Selected components will be shown as below image.

At Step 2, search and select reboot-test-linux component.
Selected component will be shown as below image.

Keep everything else default and click on Next.
In Step 3, Define image creation process, keep everything default and click Next.

In Step 4, Define infrastructure configuration, under Configuration options, select Create infrastructure configurations using service defaults.

Keep everything else default and click Next.
At Step 5, Define distribution settings, under Configuration options, select Create Distribution settings using service defaults.
Click on Next.

In Step 6, Review the sections and click on Create pipeline.
Under Image pipelines, created pipelines will be displayed.
Here we can see our pipeline is created.

Your image will be created after the pipeline is executed at the scheduled time.
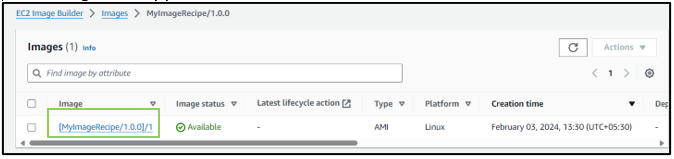
To view created image, click on images from left vertical navigation pane.
Your image will appear as below.
Now let us use this image to create a new EC2 instance.
Refer to our blog to create and connect to EC2 instance. Kindly remember to use your just now created image (MyImageRecipe) while creating the EC2 instance as shown in the picture below.

Then keep rest as default, select your keypair, subnet and select the your existing security group and launch the instance.
Now you will see your instance is running ,select your instance and click on Connect.
Once the instance is running, connect to the instance.


In order to verify whether Python-3-linux component is installed successfully run the following command:
python --version

Similarly, to verify whether amazon-corretto-11 component is installed successfully run the following command:
java -version
Note: We use java command to check Corretto version.

Further to verify whether go-linux component is installed successfully run the following command:
go --version
Note: If you don’t need the instance, terminate it. Also delete the image pipeline and image recipe.
Was this document helpful? How can we make this document better. Please provide your insights. You can download PDF version for reference.
For your aws certification needs or for aws learning contact us.


useful
Useful.
Nice Blog
very useful sir
very useful sir